What is Metal Oxide Varistor (MOV)?

What is an MOV?

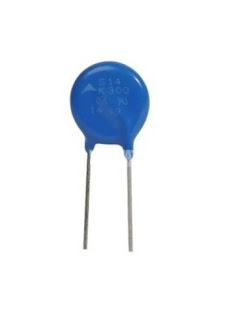
Metal Oxide Varistors AKA MOVs are electronic devices designed to suppress surges in electrical and electronic circuits.


A Metal Oxide Varistor is a non-linear surge suppressor device, which is used to suppress sudden, high abnormal voltage transients or surges, especially during the power ON of a switch or natural thunder lightening situations.

This is mostly used in sensitive electronic circuits to make them safe against such catastrophic occurrences.

MOV is a non-polar device, which means you can connect it with any side. It is a voltage dependent device, which means this device will react to the changes in voltage conditions.

Therefore, MOV is specified to trigger whenever the rated voltage magnitude across their connections is exceeded.

The voltage rating at which an MOV may be defined to fire and short the transient to the ground is called its ‘clamping voltage’.

For an example, if the clamping voltage rating of an MOV is 420V then it will be switched ON whenever the voltage across it surpasses this value (420V).

When an MOV is switched ON or is triggered by a high voltage surge it shorts the voltage spike across its terminals, which prevents the spikes from entering the vulnerable electronic device attached next to it.

Here non-linear property works, it means there will be no action from MOV side until voltage across it goes above the rated voltage, and it will work when the voltage crosses the voltage limit.


How to connect an MOV?

Connection of MOV is very simple; MOV is across the Voltage via a fuse or fusible resistor.


Comments

Popular posts from this blog

How to Make Automatic Room Light Controller Without Microcontroller

You must have noticed in some offices or hotels, when nobody is in gallery or washroom, the light remains OFF but when somebody enters the place, light switches ON automatically. In this post I am going to teach you how to make this circuit. Before going ahead I would like to tell you that this is VERY EASY circuit. For this circuit the material we need is… PIR Motion sensor General Purpose PCB - 5x5 cm. Transistor 2222N – 1 No. Relay 5V – 1 No. 1K/0.250W – 2 Nos. 10K/0.250W – 1 No. IN4007 – 2 Nos. LED 3mm – 1 No. Connector – 4 Nos. Few wires. Relay Circuit Concept : We can use any relay of 12V, 24V, 5V etc. but we have to consider power supply or battery we will use. Since 5V power supply is easily available and 9V battery can also be used for 5V output (after using 7805 regulator if needed). So I am using 5V relay. PIR sensor has three terminals, One for 5Vdc Second for Gnd (0V). Third for ...

How to drive high voltage/current load by small voltage signal from a microcontroller?

Sometimes we need to control or drive a high voltage and heavy current load by a small voltage signal. For example, if you want to control water motor with your microcontroller output. We know that microcontroller gives only 5v output which is not sufficient to drive a heavy motor. This circuit, about which this post is, is very-very useful for electronics engineer and hobbyist. So pay attention! For this circuit the material we need is… General Purpose PCB - 5x5 cm. Transistor KN 2222A (TO-92) - 1 No. Relay 5V – 1 No. 1K/0.250W – 2 Nos. 10K/0.250W – 1 No. IN4007 – 2 Nos. LED 3mm – 1 No. Connector – 4 Nos. Few wires. Tools. Concept: Weak signal triggers the transistor and transistor acts as a switch for the relay. You can use any relay of 12V, 24V, 5V etc. but we have to consider power supply or battery we will use. Since 5V power supply is easily available and 9V battery can also be used for 5V output (after using 7805 regulator if needed)....

How to control digital output with serial monitor in Arduino

Hello Friends, in this blog we will be controlling digital output with serial monitor command. First let’s understand the working of serial monitor. Serial monitor in Arduino IDE is a tool which allows communication between the computer and Arduino board via a serial connection, normally we use USB cable for connection. What are the features of Serial Monitor? It shows the data sent from the Arduino board by using the functions like Serial.print() or Serial.println(). It allows to send text or numeric data to the Arduino board, which can be read by function like, Serial.read() or Serial.parseInt(), thereafter you can use this data for further analysis and action. We can use this tool for debugging and monitoring the function of the sketch. There is a procedure to use the serial monitor, below are the steps given. First initialize the serial communication in the sketch as given below. Normally baud rate is set 9600.  Void setup(){          Serial.begin(9600)...